
Expenses
Use Expenses to record transactions manually or from receipts, save drafts, and submit expenses for approval.
Find and monitor expenses
- Open Expenses.
- Use search, filters, and sorting to narrow the list.
- Use bookmarks to save filter combinations you use frequently.
- Select My Expenses to focus on your own records.
- Select an expense to view its items, attachments, approval progress, and history.
Create a manual expense
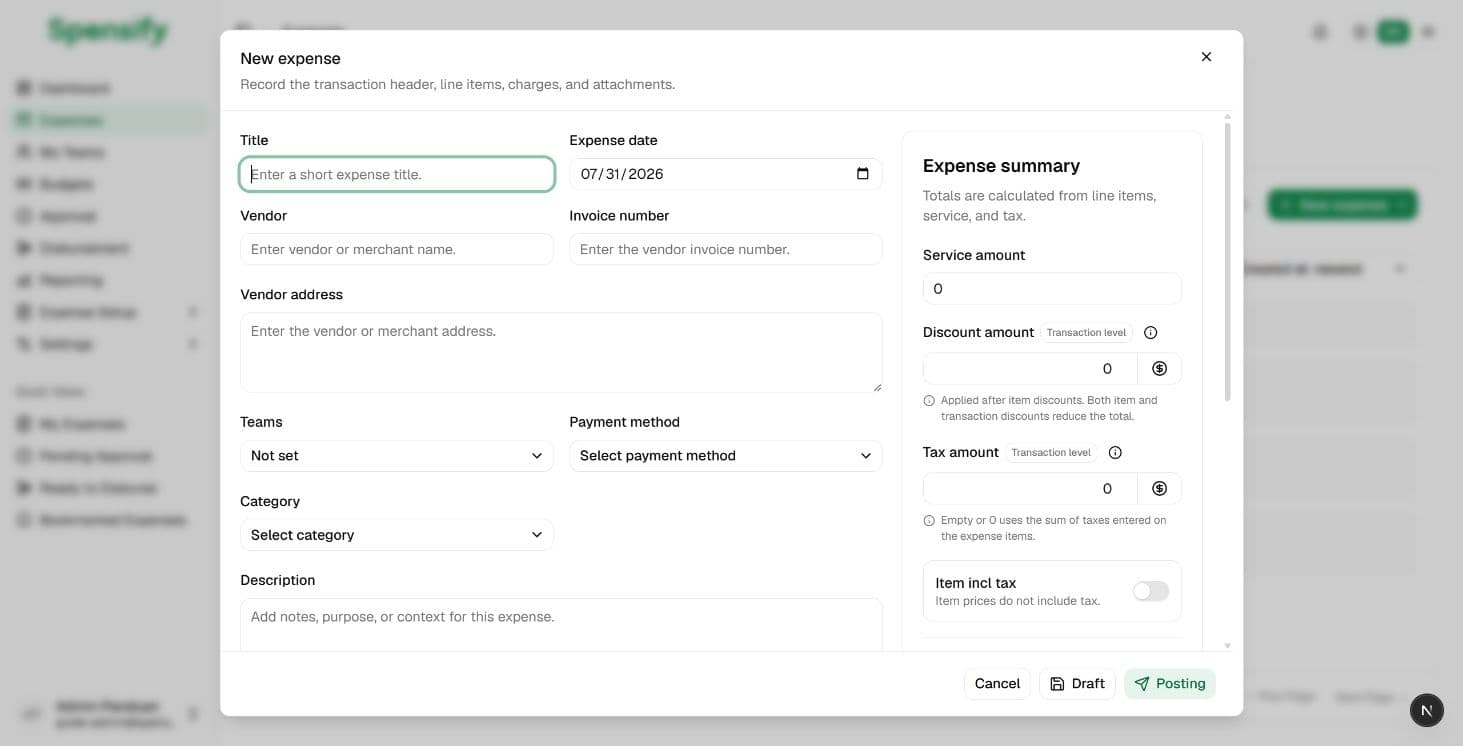
- Select New Expense > Manual.
- Enter the title, transaction date, vendor, and receipt information.
- Select the team, payment method, category, and currency when available.
- Add a description if needed.
- Add expense items, quantities, and prices.
- Enter any service charge, discount, or tax shown on the receipt.
- Attach supporting documents.
- Check the total summary.
- Select Draft to save without submitting, or Posting to submit the expense.
- Confirm your choice.
Create an expense from a receipt
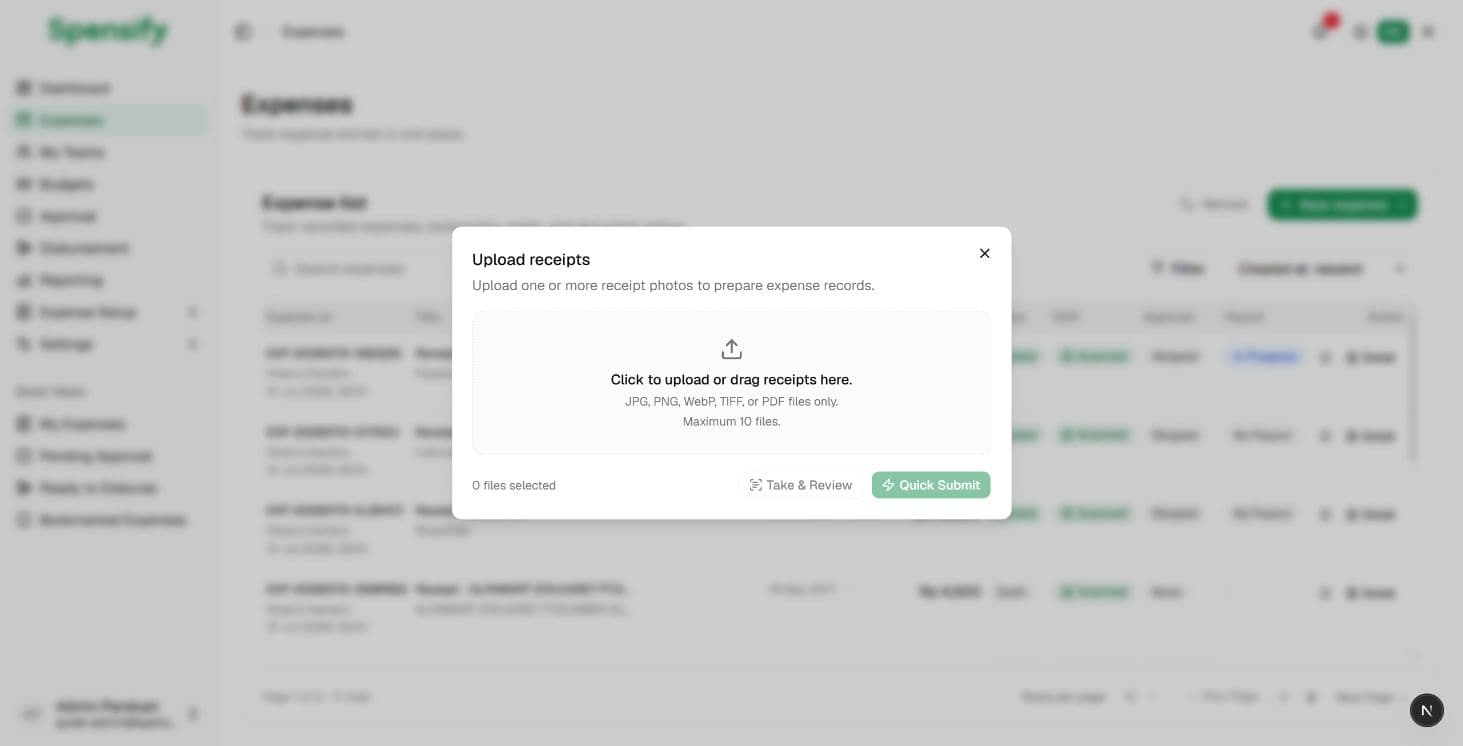
- Select New Expense > Smart Scan.
- Upload JPG, PNG, WebP, TIFF, or PDF files. You can add up to 10 files at once.
- For a multi-page PDF, choose whether each page is a separate receipt or the whole document is one invoice.
- Select a processing method:
- Take & Review for one file. The extracted information appears immediately for review and correction.
- Quick Submit for multiple files. Processing continues in the background and the results can be checked from the expense list.
- With Take & Review, check the vendor, date, items, amounts, tax, category, payment method, and total.
- Correct any inaccurate information, then save as a draft or post the expense.
If an OCR maximum is configured, SmartScan displays current usage. Monthly, quarterly, semester, and yearly limits also display their next reset time based on the configured OCR scan limit start date; a lifetime limit counts all extractions and does not reset. Each image or single-invoice PDF uses one scan. A PDF in receipt-per-page mode uses one scan for every page. The actions are disabled when the limit is reached or when the selected files need more scans than remain.
Quick Submit uses the same limit even though processing continues asynchronously. A multi-page PDF is rejected as a whole when the remaining capacity cannot cover every page, so it does not create partial drafts. Once an extraction is created, it remains counted whether scanning succeeds or fails; retrying that same extraction does not add another scan.
Manage draft expenses
A Draft remains editable until it is posted. For drafts created through Smart Scan, the Detail and Discard Draft actions are disabled while OCR status is SCANNING and become available when scanning finishes.
To remove a Draft that is no longer needed:
- Find your Draft in the expense list.
- Select Discard Draft from the Actions column.
- Review the confirmation and select Discard Draft again.
The draft is moved to Archived rather than permanently deleted. The system preserves its attachments and history for audit, records who discarded it, and removes it from the active expense list. If the expense has already changed from Draft to another status, or OCR scanning is still in progress, the server rejects the Discard request.
Use Void, not Discard Draft, for a Posted expense that must be cancelled. Void has separate approval, budget, payout, and reason requirements.
Expense statuses
- Draft: can still be edited and has not been submitted.
- Posted: has been submitted; changes are limited to preserve a consistent history.
- Void: cancelled with a reason, but retained in the records.
- Archived: no longer displayed in the main operational list, including a discarded Draft or an archived Void expense.
Review a possible duplicate
The system checks every attachment marked as a receipt. A receipt is flagged when it matches another expense based on at least one of these signals:
- the SHA-256 hashes of both files' binary contents are identical, even if the file names differ;
- the receipt images have the same visual fingerprint and normalized receipt data;
- the invoice or receipt numbers match after letter case, spaces, and punctuation are ignored; or
- the vendor, transaction date, total amount, and currency all match.
Receipts from deleted, Void, or Archived expenses are excluded. A match against an expense with rejected approval is shown only as a warning and does not require a decision. Other active matches are marked Review required. A match is evidence for review, not proof that the expense is a duplicate.
Who reviews the match
- For an expense in an approval workflow, the assigned approver reviews it from Approval.
- For an expense with skipped approval, an authorized Disbursement user reviews it from Disbursement > Eligible, when skipped approvals are enabled.
Complete the review
-
Open the expense or approval details.
-
Select Review on the duplicate receipt indication.
-
For every match marked Review required, compare:
- Current receipt and Matched receipt;
- expense number;
- receipt date; and
- amount.
Open both receipt files when you need to verify the vendor, receipt number, currency, or purchased items.
-
Choose one decision for each match:
- Not duplicate: use this when the receipts belong to separate, valid transactions. A reason is optional.
- Confirm duplicate: use this when the same receipt or purchase was submitted more than once. A reason is required, for example:
Same receipt as EXP-2026-00123.
-
Select Confirm to save the decision. Closing the dialog without confirming leaves the review unresolved.
Effect of the decision
- Not duplicate records the reviewer, review time, and optional reason. Approval or disbursement can continue only after every required match is marked Not duplicate.
- Confirm duplicate records the reviewer, review time, and required reason. The expense remains blocked from approval and disbursement and must be handled according to the company's rejection or correction process.
Next
Continue to Budgets.